Cannondale Headshok Service Manual
It can be done. I did all work by myself with no help.
Cannondale reserves the right to make changes to information contained on this site at any time without notice, including with respect to prices, specifications, equipment, models, colors, and materials. Manual library Cannondale Headshok Service Manual User 2019 This is to find out the quality of the particular editor (the procedure for planning sentences) in the Cannondale Headshok Service Manual User 2019. Require a sample of one or two pages at random.
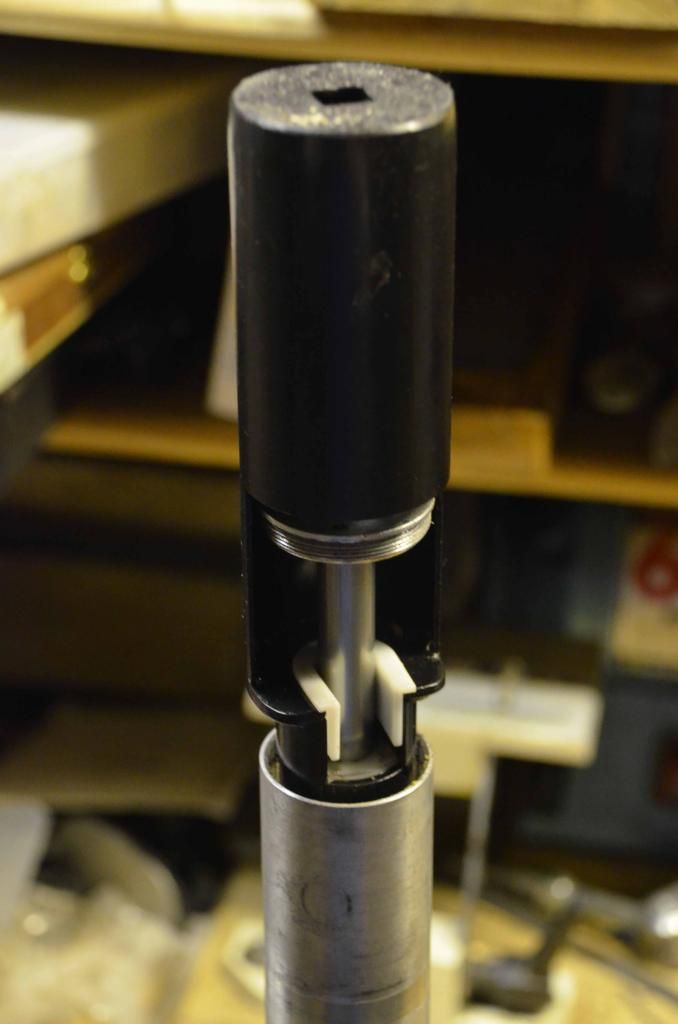
It can be a one person job. It's not half as bad as people will lead you to believe, and the design of the fork holds no terrible secrets -conceptually it's actually pretty simple! A cautionary note though: I found the job to be pernickety in the sense you had to do some stuff in the right order, and it makes a difference if you do. All I can say is that the order I've listed is the order I found that worked for me, and usually there's a method in the madness for a reason. Total cost for me to regrease, put a boot on, install new needle bearings and firm ride springkit and purchase any tools I needed: about $70.
It took me about 8-10 hours in total to disassemble, reassemble, disassemble and reassemble again (includes thorough degreasing and cleaning). Admittedly, I do have some tools already, but everything else I needed I use in the general maintenance of bikes and is not Cannondale specific (e.g. Hammer, Slick Honey grease, Pedros degreaser, etc). Basically I had nothing to lose. If I screwed up this fork or couldn't get if back together, it didn't really matter, I'd just go ebaying and get a set of adaptor cups and a used fork (also keep in mind I believe when you strip a Headshok, Cannondale may consider any warrantees null and void).
My primary objective was to disassemble the fork and put it back together. If I could do this, I'd then invest in the necessary Cannondale parts and fit them myself.
2016-06-10 14:54:40. 
I had nothing to lose but time here. Caveat number 2. Since I do not have access to top secret classified Cannondale documents regarding servicing/assembly of Headshoks, I am not privvy to torque specs or the like. This means that I put this fork back together the best way I could (Cannondale diagrams notwithstanding) using at best some guesswork and 'common sense' ('common sense' here is very subjective I know. Let me reveal here I'm not a professional bike mechanic, nor am I a qualified mechanic in any area.
What I have done is strip various car/motorcycle engines down and put them back together -working mind you!!!! -and my wife believes I have a natural aptitude for mechanics. Then again, she says I'm really good looking too;^). I consider myself to be confident at mechanics. Confident in knowing when I'm out of my depth). The point here is that I'm just posting what I did -I am by no means suggesting this is the proper or appropriate way to safely reassemble a Headshok.
So here you have it, caveat number 2: You mess with your Headshok at your own risk and this posting does not constitute in any way any endorsed ways of properly servicing or assembling or reassembling Headshoks. I am also not responsible for your costs or damages incurred, personal injuries, first born child, blah blah blah. It's all your responsibility and I can't vouch for the accuracy of this post or be responsible for any mistakes contained within.
Caveat number 3. OK, before I started this, I combed the internet looking for help. I googled, I yahooed, I did everything I could to search for any variation of the words 'Cannondale Headshok Headshock assembly disassembly installation removal' etc. Let me tell you: there isn't much out there. And what there is, is hardly encouraging. Certainly Cannondale provides no technical help in the sense of stripping down a Headshok -just rather weak technical diagrams and advice such as 'service at an authorized dealer every 40 hours of use'. Anyway, here are some helpful links I found: (also has Cannondale technical diagrams in the archive.
This was the site that helped me the most -not least because of the clear directions but also great photos. On the downside -and rather worrying for anyone reading it -it does not include reassembly instructions, nor the disassembly of the bearings and races). (has some Cannondale Headshok parts as well as proprietary tools such as the castlenut tool ~$35) (Cannondale's own documents for Headshoks) is no longer available but J. Mical supplied this copy of the complete. Some of the common themes I found in the message boards are: • don't take a Headshok apart • if you do, don't ever, ever, ever take apart the needle bearings and races. Ooops, too late. I've always been a bit pigheaded anyway -and like I said, I had nothing to lose.

• old inner tube (700x23 was the best size I found) • scissors • small flat bladed screwdriver • zip ties • degreaser • Slick Honey grease (does not degrade elastomer stuff) • WD-40 (helped degrease parts) • Threadlok (missing from photo) • 11mm open ended wrench • Green Park SPA1 pin spanner (had to buy this from my local bike store $9) • hammer • block of wood • allen keys • old front axle • vise and workbench (well lit!) • home fashioned castlenut tool out of old door hinge (used a hacksaw and file, as well as a hammer and vise to knock this into shape). • electrical tape • rags (missing from photo) • paper towels (missing from photo) • plastic ziplock bags (missing from photo) • outer race holding tool (fancy name for an approximately 15cm length of 700x23 inner tube with valve very close to one end, zip tied at both ends). Here are the parts I bought with approximate prices: • firm ride spring kit $35 • replacement boot $10 • new needle bearings $16* *worth noting here, for anybody in the greater Boston, Massachusetts area, I looked up the cost of needle bearings online, and found them for $27 at bikeparts.com.